Sunday, September 29, 2013

Gauging the Situation

Today I tackled the instrument panel. It is a simple black metal faceplate that has rust and corrosion on it, but to repaint it required it to be removed. Sounds simple? Well it would have been, except that it had 13 various dials and lights attached to it, and some of those dials had as many as 10 separate wires attached. It is a real rats nest!
So, it required careful labelling and photographing of all of the wires and pieces as I disassembled them so I have even a vague hope of getting it put back together again.
It was a four hour project to disassemble, and will take at least that to reassemble once it is painted.


Thursday, September 26, 2013

Brusha rust

Today was the first "Rover" day in more than a week. I started by pulling out the old "furflex". That's the round furry trim around the doorways. It pulled right off. more or less. It is attached with small tacks into some soft wood stripping installed inside the door frames. It should be fairly easy to reinstall. I will investigate buying some in red... my donor car has some quite new furlex, but it might not come off undamaged, and it is a light gray colour. I would prefer red.


The next job was to grind and sand off all of the scaly rust around the rear seat platform and the "ceiling". I found that a small wire brush attached to a power drill did the job quite nicely, and my rotary sander did very quick work of the "ceiling". This photo shows the rear seat platform half done.


I decided to pull off the rubber running board mats to see what was underneath. The rubber had been replaced once before. It was attached by a combination of glue and small screws. Three of the four running boards had a small aluminum strip attached under the rubber.


It was no surprise to find lots of rust there, but as you can see the drivers door sill is perforated. Fortunately the remaining metal is quite strong, so it should be patchable.


All of the interior is now sanded and ground as much as can be superficially. I will have to now decide what to do about stopping the rust. Rust Mort or POR products probably... and then I will begin work on the dashboard and instrument panel before beginnign to reinstall the interior upholstery.

 The good news is that this is the first, and hopefully only, rust perforation that I have found.

Tuesday, September 17, 2013

Headline attraction!

With some trepidation I took out the headlining today. I had never worked on a car's headliner before, and could find little information on how it all is assembled.
As it turned out, it was relatively straightforward, and looks fairly straightforward to swap in the headliner from the parts car eventually.
At the front, sides and rear of the main headliner were hardboard trim panels which were attached by simple push clips, and an occasional screw or two. Once they were pulled off, it was apparent that the main headliner frame was removable as a whole unit with just a few screws.
The inside of the metal roof is covered with scaly rust, but as with the rest of the body, it appears to be just surface rust, and easily treatable. The car looks quite the mess at this point, all stripped out and rusty, but the reality is the work has gone very well to this point, and things are looking very manageable.
Next step will be thorough scraping of the interior and exterior. I will have to ask around as to what kind of treatment of the rusty surfaces will be most effective, and then begin reassembly.


Tuesday, September 10, 2013

Naked seats


September 10/13

Did that title get your attention? I had the entire afternoon available to work on the car, so I went to work seriously on the interior of the "boot" and the cabin.
I am very impressed with the appointments of this car.... very nice leather looking liner all around the trunk... no bare metal like usually found in an american car. It was in fairly good shape, and fairly easy to remove, just a few rusty screws. When all was pulled out, the bare trunk looks not bad at all. There is some rust to be scaled off in the lower right and lower left corners, but nothing worrying.

Add caption

I then went to work on the seats. The rear "squab" (Brit for seat back) is pretty well shot. It looked a bit ugly under it and in the corners, but really not as bad as it looks. The rust is just scaly stuff on the surface, and the upholstery bits are replaceable.
The front seat came out in two parts... the seat cushion just lifted right of, but then the frame and squab had to be unbolted from the floorboards. The slothead screw bolts were pretty seized, and only after a good deal of whacking the screws with an impact driver did I realize I could have just loosened the nuts from underneath.
The carpet is pretty well shot.... some of it just comes apart in the hands, but underneath, everything is pretty solid. No threat of floorboard rust through.
I will have to make some decisions about carpet replacement. The grey donor car has brand new properly fitted aftermarket carpets than can just be thrown right in, but there are a couple of problems. Firstly, they are black, not red, and secondly they are some kind of shiny synthetic material. They will look quite OK, but not "original" enough for my satisfaction. I think what I will do is put in the black ones until I can afford to have red ones made, then swap the black ones back to the other car.
The car looks pretty stripped down at this point with no interior and no doors, but it feels good to be progressing so nicely.
I am thinking I will do as much as possible to the interior before refitting the seats. The next steps will probably be polishing and refinishing such items as gear lever, instrument facia panels, and then the interesting project of refinishing the wood trim. I have been in touch with the upholsterer, and he may be able to go to work on the headliner sooner that expected. It would be nice to get that done this fall before reinstalling the seats.


Buried treasure

Rotten carpet\


Rear Seat platform. Not as bad as it looks.
Naked floorboard


Saturday, September 7, 2013

Begin strip down

September 6/13

Now that it is known to run, it is time to begin stripping the car down to clean up the rust and ready it for the upholstery.
So I began assessing the door problem again. I figured out how to remove the right rear door fairly easily (though the bolts were seized and took some work), and with the door on the work bench I was able to peer in more easily to figure out the workings. It turned out on that door, that the main issue was simply seized mechanism, which I managed to free up with WD40, though that was tricky having to aim it by mirror and upside down. The right rear door was trickier still, as I ran into a catch 22.... the mechanism couldn't be easily fixed with the door shut, but I could not open nor remove the door with it stuck shut! In the end, I managed, with assorted scraped knuckles, to get some WD 40 in there, then pry the mechanism with a little nail bar. Eventually it popped open, so I was able to then remove the door. That door will require a new mechanism, which I guess I will steal from the grey Rover.


September 7/13

I removed the front doors today. This was an uneventful project, as I had the experience of the rear doors under my belt. Having the doors off will make access to the interior seats and upholstery much more workable.

It's Alive, It's Alive!

September 4/13

It runs like a top! I knew I was close to getting it going, because I had spark. So today I swapped in the new looking aftermarket fuel pump from the grey Rover. It did not go quite smoothly. Once I had it installed,  there was still no gas coming through. I tried blowing out all the fuel lines, syphoning fuel into the lines, etc, etc. In the process I broke the new pump by pulling out a non-solderable wire! So I had to but another new pump from Kenmac. During the process, Pat noticed fuel leaking from up in the right rear wheel well. It turned out to be a rotten fuel line, but it was quite easy to splice in a section of new rubber line at that point.

Finally, I decided to dump in another 20 litres of gas... that was the problem! I still don't understand why the 15 litres I had added earlier was not enough to get the fuel moving.
So, hit the ignition and starter, and VROOM! It started, and purred like a pussycat!
I moved it around the driveway a bit to check out the brakes, clutch, transmission and things.
It runs very smoothly, and the brakes and steering work very nicely.... showed me just how bad the steering and brakes were on the grey Rover!


Spark, but no gas.

August 30/13

I swapped in the battery and the ignition coil from the grey Rover. I got a fairly decent spark happening, so reinstalled all the spark plugs. Still no start, so I will next swap in the fuel pump from the grey car.

August 31/13

My project today was to begin assessing why the doors don't work. The right rear door is jammed shut, and the two left side doors will not latch. I removed the inside door panels on both, and began snooping around to figure out how they work. It is not an easy task, because the working are all inside the door, and can only be seen by using a mirror and flashlight. Now I can sympathize with dentists!
I did not figure out the problem yet.


Friday, September 6, 2013

I bought another one! a '59 P4 100

August 28, 2013

Well, why just have one Rover when you can have two?
I chatted more with Bill Sharp of Victoria about the 59 P4 100 he was selling. He assured me that the interior was good, which is exactly what I am looking for. So, off I went by ferry and bus to Swartz Bay where Bill picked me up and drove me to his barn in Metchosin.
It was a fun visit... he had a 54 "cyclops" model 75 I think it was, a 1948, and the grey 100 that he was selling. Sure enough, the upholstery was quite spiffy. He was willing to sell it for $3200, which is less than it would cost me to have upholstery made, so no matter what mechanical issues it had, it was worth it.

And mechanical issues it had!... as I discovered as I drove it up the Island Hwy to the Nanaimo ferry. the first thing I noticed was the steering was all seized up. It took both arms to wrench the wheel around, and on the road it would not self correct.... I had to always manhandle it to the correct alignment in the lanes. The second thing I noticed was that the brakes were almost non-existent. they would work at about 25% once pumped a bit. Needless to say, I kept my distance from vehicles ahead, and watched carefully for stale traffic lights. Oh, and by the way, no seatbelts!
And, last but not least, it didn't want to go uphill. It would chug and lose power on any kind of upslope. Thankfully it somehow decided to make it up the Malahat if I nursed the throttle carefully, but there were a couple of other hills later on where she chugged to a stop and I had to let her rest for a while.
I missed the 5:30 ferry which raised the dilemma of getting from the Horseshoe Bay ferry terminal at 9 pm up the hill the hill to the Caulfield turnaround with no power and no lights. So, i cut my losses and parked it in the parkade there, walked on the last ferry to Langdale, then returned on the 6:20 am ferry next day to retrieve the car. Surprisingly, she ran OK up and around Caulfield, but getting from lower Gibsons to home later that afternoon was very difficult.
Talking to Bill Sharp, he beilieves the lack of power may be due to a slipped timing chain. I will worry about that if and when I decide to rebuild this one.
The main point is that I have solved the upholstery issue!


Re-upholstery explorations

August 17, 2013

I chatted with Phil, a local fellow referred to me by Coasters car Club people. He is a professional upholsterer, and I have seen his fine craftsmanship on other cars. He came by to have a look at my car. He is not able to do any work until Spring, and suggested I spend the interim time exploring options, watching for "kits", and deciding on quality of work desired, ie vinyl vs leather, quilted or flat, materials for carpet and headliner.

You can see that considerable work is required.


August 20, 2013


I tried the starter with plugs removed. It turned over nicely, but when I checked for spark, nada. So I began communication with Ruth Burgess of All British Autos in Burnaby regarding ignition parts.


First attempts, and new keys

August 1, 2013

The car has been stored dormant for a few months while I finished rebuilding Michelle's brown 84 Westfalia van.
I made my first go at starting the car. I found the battery after some searching, under the rear seat. There is rust around the battery and rear seat platform, but it appears manageable. The car appears to be 12 volt, to my surprise, and positive ground, which is opposite to modern cars.
I put the battery on charger but it only seemed to take 11 volts, and I could not attempt a start as I still did not have a key.


August 16, 2013

I pulled down the instrument panel facia to access the ignition lock cylinder, removed it and took it to Tony's locks in Sechelt for new keys. $32.50.
After reinstalling the cylinder I tried the ignition. I did get the warning lights, but no starter turnover. probably the battery is too weak. Will try again later.

August 17, 2013

I was browsing online and discovered a 59 Rover P4 100 for sale in Victoria.

Purchase, and discovery of amazing historical coincidence!


March, 2013: Purchase and discovery of incredible historical coincidence!


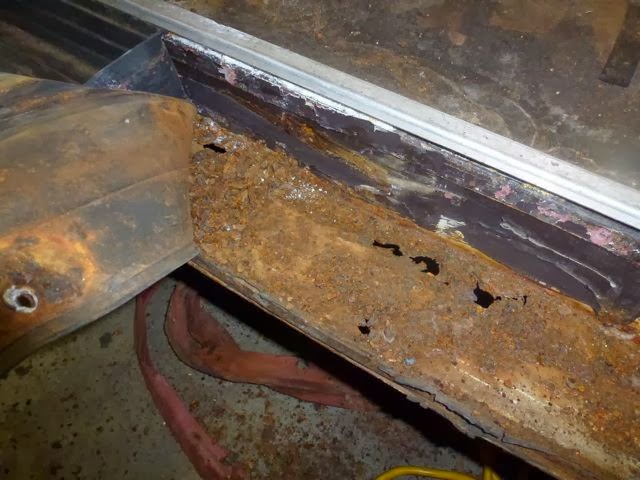
Purchased a white 1956 Rover P4 90 from Walt's Towing in Gibsons for $800. It seems very original and in fairly good shape, no rust through anywhere. The interior will be the challenge, as it was left to rot for a few years. Cracks in the upholstery, mold and mildew on trim and headliner.


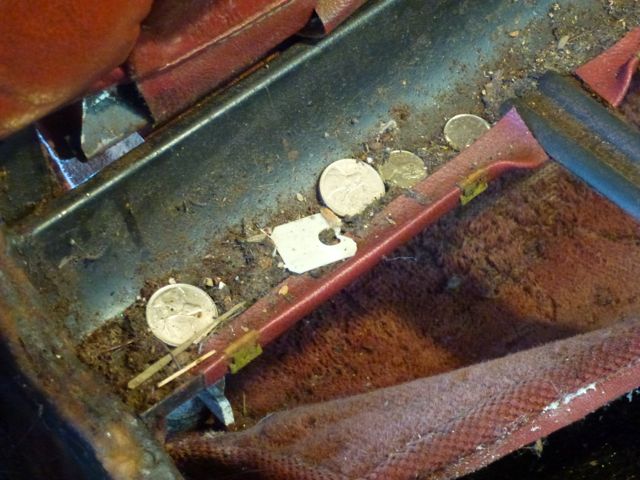
Shortly after purchase, I posted photos on my Facebook page, and a friend for Roberts Creek replied that it was the car previously owned by LJ who works at Gumboot restaurant. So I headed out there and made contact with LJ. He said it had been running the last time he had fired it up, but he just couldn't afford to continue with the parts etc needed to keep it going. I asked him if he knew where the missing ignition key was... no he did not, but he said they might be in the glovebox. I had thought the glovebox was locked, but he said it was only stuck... give it a good pull. He also said he thought the car had been a courtesy car for the Empress Hotel in Victoria.
Upon return home, I yanked on the glovebox door, and lo and behold.... no key, but a treasure trove of papers revealing pretty well the entire history of the car!
The car was purchased by Arthur Charles (Charlie) Bancroft from Sherwood Motors, Burrard Street in January of 1957.


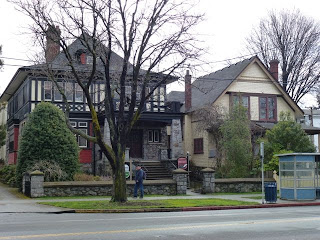
Mr. Bancroft lived at 1009 Cook Street in Victoria at the time. 
Incredibly, that was right next door to 1005 Cook Street where my wife, 7 years old at the time, and her family was living. The car now in my driveway was right next door to my wife in 1957 and 1958! Both houses, 1009 and 1005 Cook Street are now heritage houses in Victoria, and now we have a heritage automobile to accompany them.

There is no evidence of any connection with the Empress Hotel.
Charlie Bancroft apparently died in 1965, and the car was inherited by his daughter, Doris Bancroft, who was a spinster and school teacher. Doris kept the car, and ran it for another 35 years, until her death in 2000. So the car was with the first owner's family for 43years!
The car then was registered with David Hogarth of SaltSpring Island for a year. I contacted Mr. Hogarth, and he revealed that he was a cousin of Miss Bancroft, and inherited the car from her. The historical connections continue, as my wife has family on SaltSpring Island.
After about a year, Mr. Hogarth sold the car to a  James McBride of SaltSpring Island in June of 2001. Mr. McBride apparently kept the car until 2007, and appears to have moved to Lake Cowichan in that period. It appears that Mr. McBride sold it to Jeffrey Wihlidal of Roberts Creek in August of 2007 for $1500, and the car then moved to the Sunshine Coast. Mr. Wihlidal is the friend of LJ, referred to earlier. They apparently tried to keep the car running as a daily driver, but eventually gave up, and left it to sit for a couple of years before turning it over to Walt's Towing.